CarePro SaaS Documentation

By Intermatics


Thank you for purchasing this application. If you have questions that are beyond the scope of this help file, contact us.

Before you begin installation, make sure you have a webserver that meets the following requirements:

  • PHP >= 7.3.0
  • MySQL >= MySQL 5.7
  • BCMath PHP Extension
  • Ctype PHP Extension
  • JSON PHP Extension
  • Mbstring PHP Extension
  • OpenSSL PHP Extension
  • PDO PHP Extension
  • Tokenizer PHP Extension
  • XML PHP Extension

CarePro was built using Laravel 7


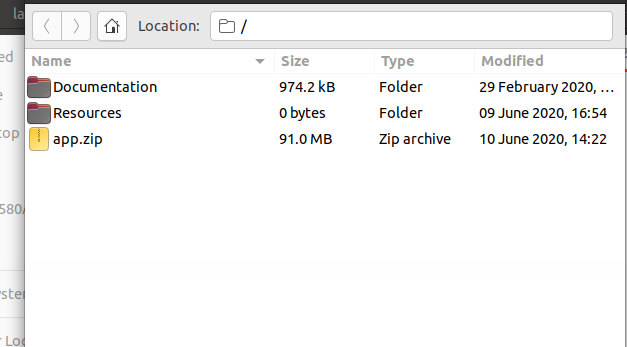
The CarePro Download consists of the following files

  • Documentation (Directory)
  • Resources (Directory)
  • app.zip


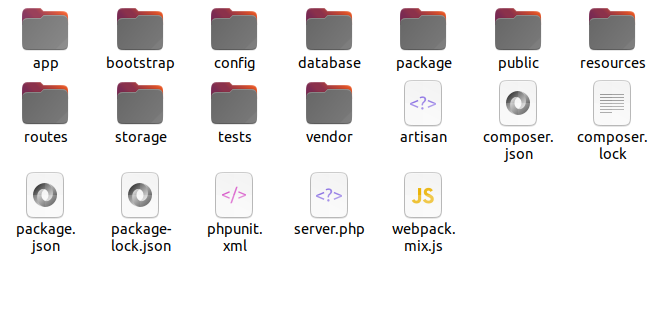
The main application's files reside in the app.zip archive. Extract this archive to your web server. You should see the following directory structure:

We recommend that you point your domain name to the public directory. Your should be able to do this from your hosting's control panel. Otherwise, you can use the .htaccess file located the the 'Resources' directory (this file might be hidden depending on your operating system. Make sure you enable display of hidden files for that directory). Simply upload this file to the same directory as the public folder and then change the [YOUR_DOMAIN_NAME] placeholder to your actual domain name
Open your web browser and enter the domain name for the application. You should see the setup wizard open like below:


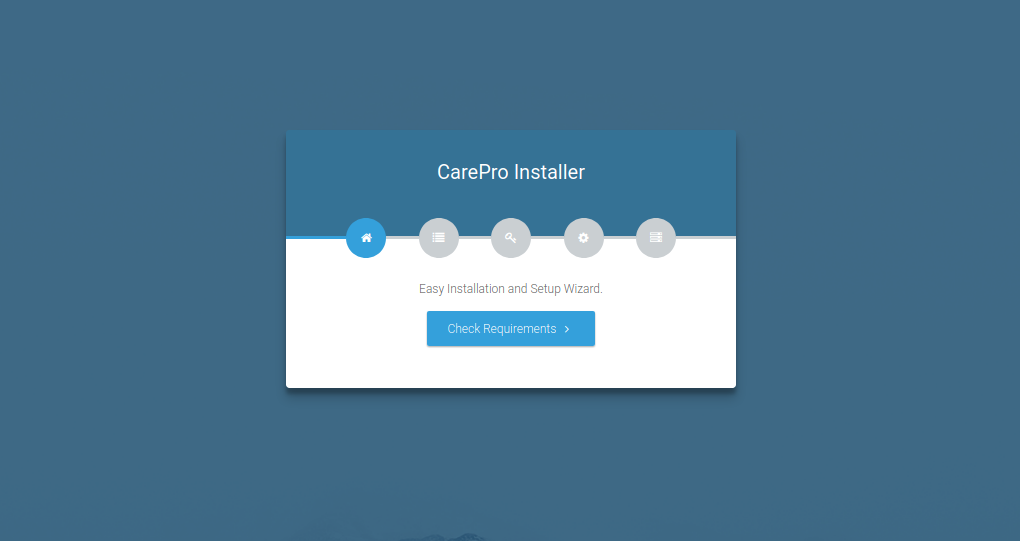
Click on the 'Check Requirements' button to start the setup wizard.


This step will check to make sure that your server meets all the system requirements for the application. If any of the requirements report a problem, ensure that you fix it before proceeding with the installation.
If every requirements checks out okay, click on the 'Check Permissions' button in order to proceed


This step checks to see if some folders in the application have the right permissions. If it is reported that any directory does not have the right permissions, make sure that you fix it before proceeding with the next step. You should be able to fix the permissions from the command line or from the filemanager of your web hosting.
Next, click on the 'Configure Environment' button. This brings up the following page


Clicking on the 'Setup Wizard' button brings up the following page


The available options on this page are explained below:
  • App Name: The name of the application. You can enter your company name here
  • App Environment: If you are setting up for a live environment, set this to 'Production'.
  • App Debug: If you are setting up for a live environment, set this to 'False'
  • App Log Level: Leave this as the default
  • App Url: Set the url for your application here e.g. https://mysite.com
Next, click on the 'Setup Database' button. This will lead to the page where you will setup the database for the application. Kindly note that, even though Laravel supports multiple database types, CarePro has only been tested in MySQL/MariaDB and that is the database we recommend.
Before proceeding with this step, make sure that you have already created your database on your server and you have added a user to the database. Ensure that you give the user ALL privileges to the database. This will prevent errors during the database setup.


After you enter in all your database credentials, click on the 'Setup Application' button
The next step presents some advanced options. The only thing you need to change in this step is the 'Mail' section
Click on the 'Mail' tab.

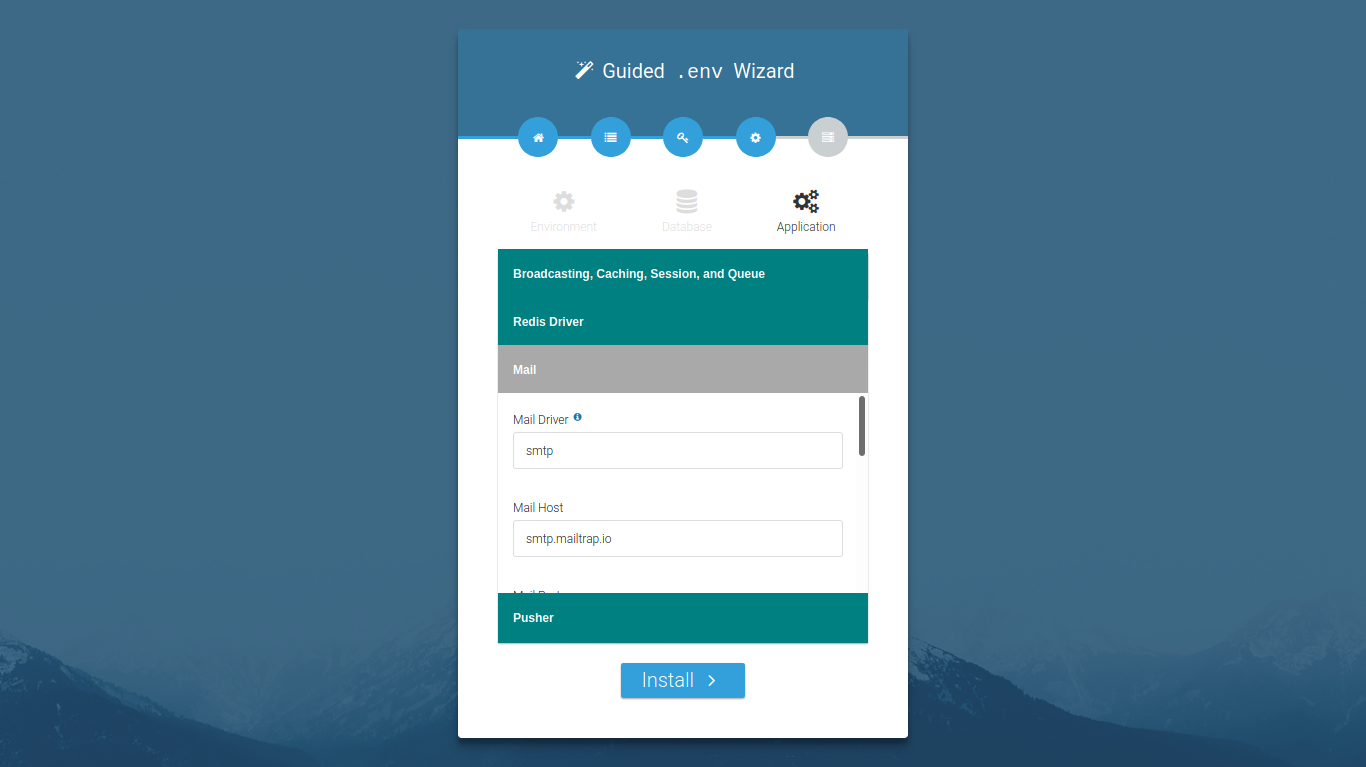
If you have smtp credentials for your email account, then you can set them up here. Otherwise, change the 'Mail Driver' option to mail. This will set the application to send our email directly from PHP.
Finally, click on the 'Install' button. This will install the application. (These operation might take a few minutes so ensure that your server's PHP timeout value is high enough).
Once the installation is complete, you will see a page like below:

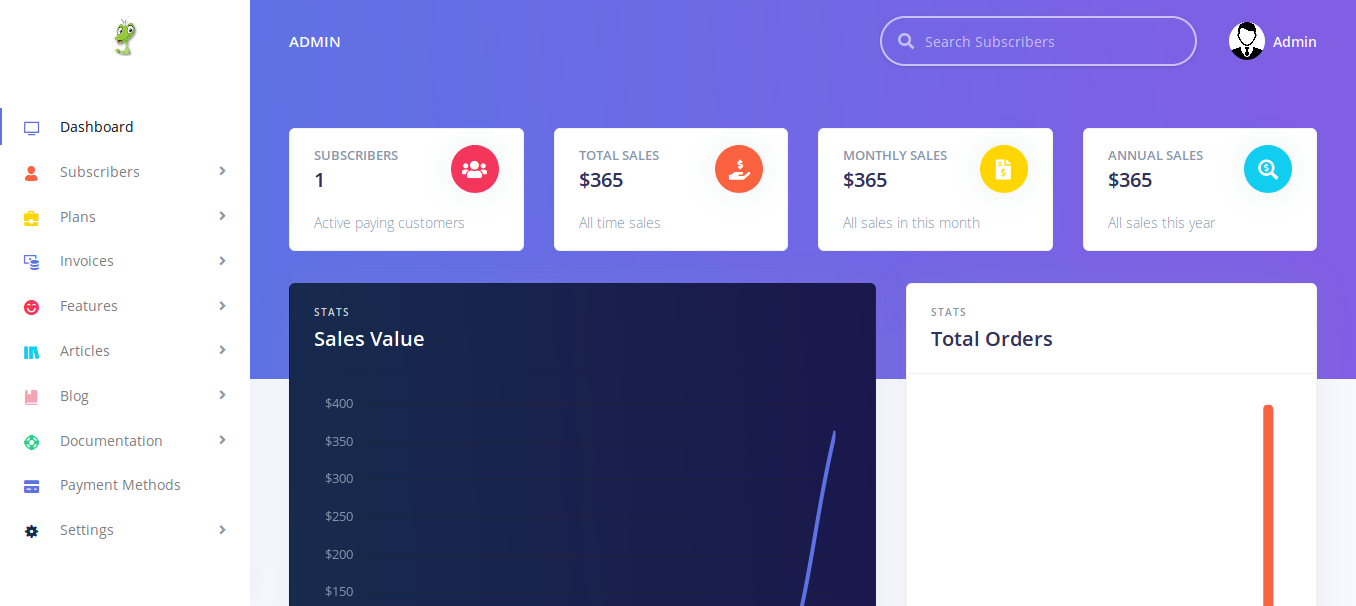
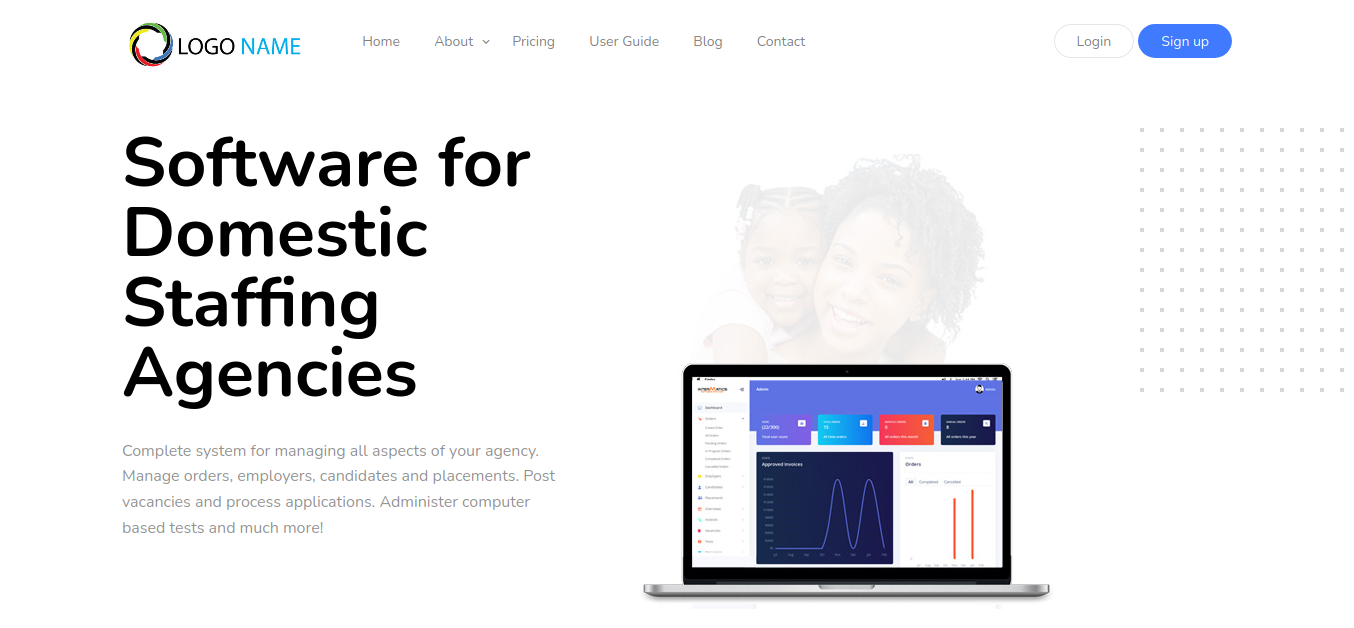
Click on the 'Click here to exit' button and you should then be directed to your homepage


SETTING UP THE TENANT DATABASE (OPTIONAL)

By default, CarePro is configured to use a single database to hold both the Saas and Tenant tables. However, we support using two tables, one for the SaaS site and the other for the tenant tables. This is the recommended approach. In order to enable this, add the following entry to your .env file (in the root directory):
DB_TENANT_DATABASE=[your_database_name]
The resulting env file will look similar to:

DB_CONNECTION=system
DB_HOST=127.0.0.1
DB_PORT=3306
DB_DATABASE=SAAS_DB
DB_USERNAME=
DB_PASSWORD=
DB_TENANT_DATABASE=TENANT_DB


YOUR FIRST ADMIN ACCOUNT

When you install the application for the first time, a default Admin account is created for you. The credentials for this account are as follows:
Email: admin@email.com
Password: password

Click on the 'Login' link at the top in order to login to your admin area

The application comes with 2 roles. They are:

Administrators have access to a separate Admin section where they can control the entire application. Subscribers are the tenants that signup to purchase plans

All CarePro users (both admins and subscribers) use the same login form. Login by clicking the 'Login' link at the top menu
Once you login with your first Admin account, you will be directed to the admin section. You should see the following screen:

In this section, you can setup the structure and options of the application. You can also manage all users and administrators here.

The member section is where subscribers can view details about their subscription and pay for invoices. Once a subscriber logs in, they will see the following dashboard:

Please note that a user will only be directed to the dashboard if they completed the setup form during registration.
If a user did not complete the setup wizard, they will be redirected back to the wizard after they login.

The dashboard contains different information about the user's subscription. It shows them their current plan and also their most recent invoices.

In this section, we are going to cover all the configuration options available on the application

Administration Settings

When logged in as an Administrator, you will see a 'Settings' menu option at the bottom of the left hand side menu (on Desktop devices)

Under this menu, there are various options:

General

The General settings page enables you set basic information for the entire application such as the Site's name, the email used for notifications (Site Email) etc. Some important settings here to note are

Free Trial

Gforce enables you setup a free trial for new users. This page enables you configure it.

Currencies

The application supports multiple currencies. On this page, you can easily add new currencies and configure you existing currencies.

Each currency has the following values:

Language

CarePro supports 18 languages out of the box! On this page, you can change the entire language used in the user interface with the click of a button.
The dropdown control displays all the installed languages.

MailChimp Settings

You can integrate the Gforce newsletter signup form (available on the footer of all public site pages) with MailChimp.
On this page, you need to set your Mailchimp Api Key and the list id of the mailing list you wish to subscribe users to.

Logo/Icon

This section enables you update the Main Site Logo and the Browser Tab icon (Favicon).

Email Settings

CarePro enables you configure the way email is sent directly from the setting section. You can choose either the 'Mail' option or 'SMTP'. If you choose to use the 'Mail' option, the application will send email directly through php (or whatever method you set in your .env file if you modify it). If however you choose the SMTP option, the system will only send mail via SMTP using the credentials you supply.

Social Settings

Set your links to your social media pages here. Please set the full url e.g https://facebook.com/yourpage . The social links are displayed on the footer of all the site's public pages.

Administrators

The Administrators page shows a list of all Administrator accounts on the system. You can create additional accounts here and modify existing ones.

You can create as many subscription plans on the application. Each plan can have a monthly and annual price. You can set the various limits available for each plan.

Creating a plan

Click on 'Plans'-'Create Plan'. The following page will appear:

You will see two tabs on this page. 'Details' and 'Payment Settings'. Under the details tab, you get to set the main options for this plan
Under the 'Payment Settings' tab, you get to setup the Stripe payment gateway plans that correspond to this plant's annual and monthly prices. You can skip this if you are not using stripe.
Also visible on this tab are the webhooks for both Stripe and Paypal. It is CRUCIAL that you set these webhooks in their corresponding gateways if you are using any of these gateways. Failure to do so will prevent your subscriber's invoices from getting approved after payment.

The subscribers section allows you to manage all the subscribers on your application.
You can also add a new member here and add them to a plan.

Click on 'Add New' to create a new subscriber. Most fields here are self explanatory. However, take note of:

Modifying Subscribers

You can make changes to a user's account by clickin on the 'Edit' button. On the edit page, you will see an 'Expires' field that brings up a date picker. This field can be used to set the expiration date of a subscriber's current subscription. This is useful should you need to manually extend or reduce a user's subscription.
A note about the 'Enabled' option: If set to 'No' then the subscriber will not be able to login. Also, their portal will be listed as unavailable.

Domains
On the Subscriber list page, if a subscriber has completed the setup wizard (or you created them yourself), you should see a 'Manage Domains' option for each subscriber.

Clicking this button will lead to a page where you can see the list of all domains associated with a subscriber. A subscriber can have multiple domains associated with their account.
However, from the subscriber's account area (when they login), they can only modify the first default domain name (the subdomain) created for them. If they wish to use a regular domain name or multiple subdomains, you can set it up for them here.

Out of the box, Gforce comes with three payment methods that you can setup for your site:

Clicking the 'Payment Methods' menu option, displays all the available methods

The enabled column indicates if the method is live on the site or not. The sort order indicates the position the payment method will be displayed relative to others (in ascending order).
Click 'Edit' to modify a method
On the payment method edit page, take note of the following:
Notes on Stripe Gateway
In order to use Stripe, you will need to first create all your plans on the stripe website to correspond to the name and price of your plans created on the application. It is the plan that you configure on the Stripe site that subscribers will pay so make sure it tallies with what is on the site in order to prevent confusion. The currency the customers will pay in on Stripe depend on the setting on the Stripe site so if they select a different currency during checkout, it will have no effect during actual payment.
Also ensure that you set your webhook on the Stripe site. The webhook is of the form yourdomain.com/webhooks/stripe See the 'Managing Plans' section for more information.
Nots on Paypal Gateway
Payments via paypal will use Paypal's subscription billing system. The currency selected during checkout on Gforce will be passed on to paypal in order to enable the susbscriber pay in their preferred currency. Hence ensure that the currencies you set for paypal here are actuall currencies that paypal supports.
It is also crucial that you setup your webhook on Paypal. The url is of the form: yourdomain.com/webhooks/paypal . This is necessarry for auto renewal of subscriptions.

In the Invoices section, you can see all invoices generated by users or automatically.

You can also create invoices here. Clicking 'Approve' for an invoice will automatically renew the subscriber's subscription

Notes on plan changes
If an invoice is approved for a subscriber on the current plan they are on, then their plan will be extended i.e if their subscription has not expired, they will simply be extended so they do not loose any remaining days. However, if the invoice is for a different plan other than the plan the subscriber is currently on, then the subscription will start afresh from the date of the approval.

Managing Articles

CarePro articles are static pages of content that you would like to create to add information to your portal. Typically, you would use them to create pages like 'About Us', 'Vision', 'Mission' etc. Articles can be placed on the navigation menu for easy location by your visitors.

To manage your articles, click on the 'Articles'-'Manage Articles' menu option

The list of existing articles will be displayed. To create a new article, click on the 'Add New' button

This opens the article creation page

The fields on this page are described below:

  1. Title: This is the main heading of the article as it would appear on your site.

    This will also be used as the browser title if the 'Meta Title' field is left blank
  2. Content: This will hold the text content of the article
  3. Slug: This is the Url identifier for the article e.g. htttps://yourportal.com/who-we-are. You can safely leave this blank and it will be generated automatically from the article title you specify.
  4. Meta Title: This contains the browser title for the article. If left blank, the article title will be used instead. This field is especially useful for Search Engine Optimization (SEO).
  5. Meta Description: This Contains the page description visible to search engines. The content of this field will not be visible while viewing the article in the browser but is very useful when optimizing the page for search engines.
  6. Enabled: Specify if the article can be viewed or not.

Click on the 'Create' button when done.


Managing Blog Posts

CarePro comes with a blogging feature that enables you maintain an easy to use blog on your portal. The blog comes with categories and  scheduling posts.

Managing Blog Categories

Blog posts can be organized into categories. It is recommended that you create your blog categories first before you start creating posts. To manage your categories, go to 'Blog'-'Manage Categories'

This brings up the list of existing categories

To add a new category, click on the 'Add New' button

Fill in the name and sort order of the category. The sort order is a number that determines the position of the category on the blog listing page in ascending order.


Managing Posts

Blog posts are news-like entries that you add continuously to your site. To manage your blog posts, click on the 'Blog'-'Manage Posts' option


This brings up the list of all blog posts.

This list shows the title of the post and its publish date. It also shows if the post is enabled or not. Disabled posts are not visible on the frontend.

Click on the 'Add New' button to create a new post

Each field presented on this form is described below:

  1. Title: This is the main title of the blog post
  2. Content: This is the main content of the blog post
  3. Published on: This is the date you want the post to go live. Please note that if you set a future date as the publish date, then the post will not be visible on the frontend until that date.
  4. Categories: Select the categories that this post should belong to. You need to have already created the category as described above. You can assign a post to multiple categories.
  5. Enabled: Specify if the post should be visible or not.You would usually make a post disabled if you are still working on its content.
  6. Cover Image: Select an image from your computer that will serve as the main image displayed for this post on the blog listing page.
  7. Meta Title: This is the browser page title for this post. If left blank, the post's title will be used. This field is especially useful for search engine optimization purposes.
  8. Meta Description: This is the internal description for this post visible to search engines. This field is useful for search engine optimization. 

Click on the 'Create' button to add your new post.

The documentation feature is an online user guide that your subscribers can consult to learn more about managing their application.
You can organize help articles based on categories.

It is important that you setup a cron job when you install Gforce. This will enable the application be able to send out notification to subscribers. It will also trigger the cron jobs for each active subscriber.
To setup your cron job, add this cron command to your server
* * * * * cd /path-to-your-project && php artisan schedule:run >> /dev/null 2>&1

Upgrading CarePro is straighforward. First you need to backup the entire system. Next, copy the public/uploads and public/saas_uploads folder to a separate location. Also copy the .env file (in the root directory) to a safe location. Then replace the application's files with the new files you downloaded. Once you have done this, place back your .env file back to the root directory. Also copy your public/uploads and public/saas_uploads directory back.
Finally, open your terminal and run the following commmands:
php artisan migrate
php artisan tenancy:migrate